
[ad_1]
Kubernetes is an open-source container orchestration know-how that simplifies containerized software deployment, scalability, and administration. Amazon Web Services (AWS) affords a totally managed Kubernetes service beneath the identify Amazon Elastic Kubernetes Service (EKS).
You may set up and handle Kubernetes clusters on AWS with EKS without having to deal with the underlying infrastructure. On this article, we are going to stroll you thru organising and administering Kubernetes clusters on AWS utilizing Amazon EKS.
Stipulations
There are specific conditions that you should fulfill earlier than you begin. These are given under:
- An AWS account with the required permissions to create an Amazon EKS cluster.
- An AWS Identification and Entry Administration (IAM) person or position with the required permissions to create and handle AWS sources.
- A Digital Personal Cloud (VPC) configured with subnets in at the very least two Availability Zones in your most well-liked area.
- The AWS Command Line Interface (CLI) is put in in your native machine.
Steps for Utilizing Kubernetes Clusters on AWS with EKS
Step 1: Create an AWS EKS Position
Step one includes creating an EKS position that Kubernetes can tackle to ship the required sources. Log in to the Amazon Administration Console, choose Position, after which click on New Position to create the EKS Position. Select EKS from the listing of Amazon Providers, then click on Subsequent.
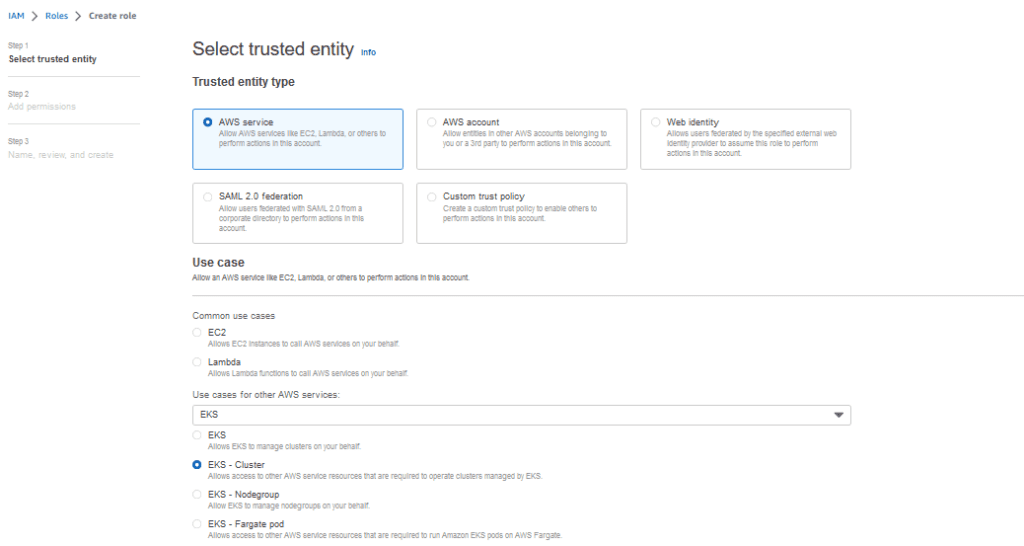
By default, it can choose a predefined coverage for position, which is:
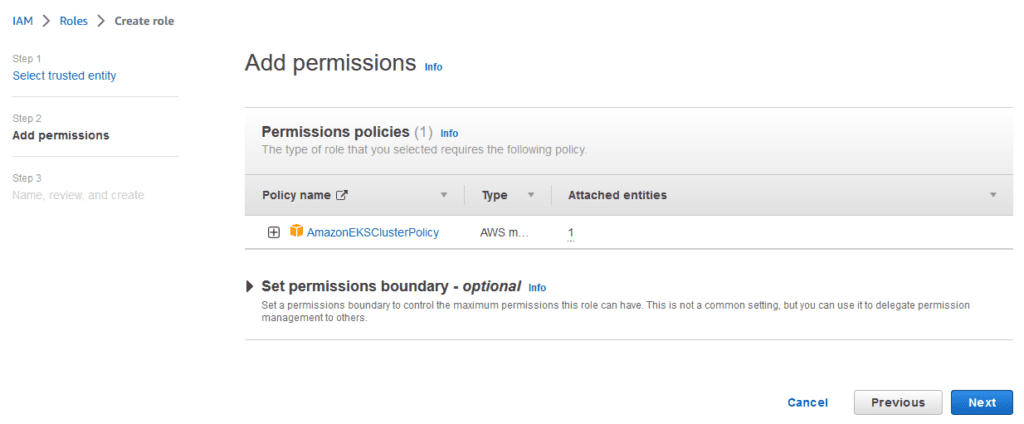
Click on Subsequent and Enter Position identify. Assessment and create position.
Step 2: Configure VPC
- Open the Amazon Digital Personal Cloud (VPC) console and click on “Create VPC.” Enter the identify of VPC and CIDR.
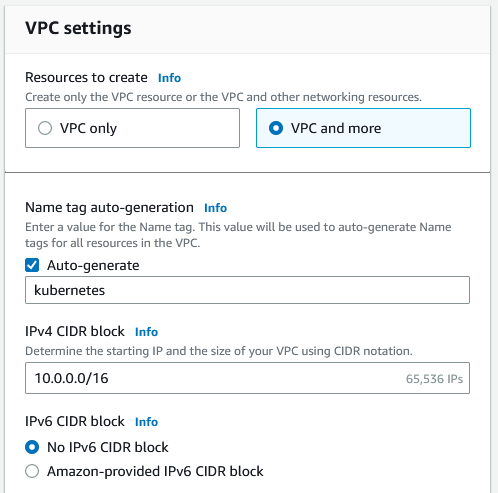
- Choose the supply zones and the variety of non-public/public subnets you wish to create.
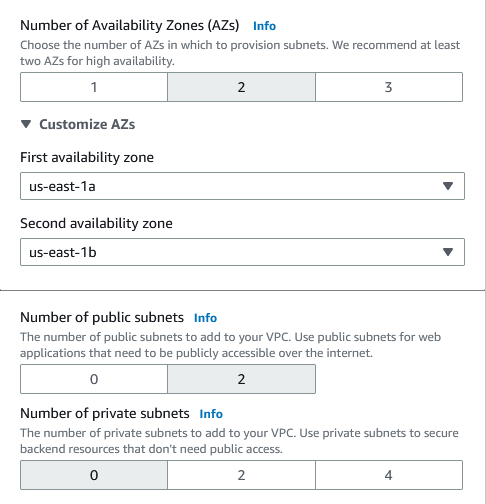
- Present any additional data wanted after which click on “create.” Subsequent, create a safety group on your EKS Cluster that meets the necessities. We are going to want this safety group later.
Step 3: Create an Amazon EKS Cluster
The third step is to create an Amazon EKS cluster. You should use the Amazon Administration Console, AWS CLI, or AWS SDKs to create a cluster. We are going to use the AWS Cloud Administration Console on this how-to information.
- Open the Amazon EKS console.
- Click on “Create cluster. “
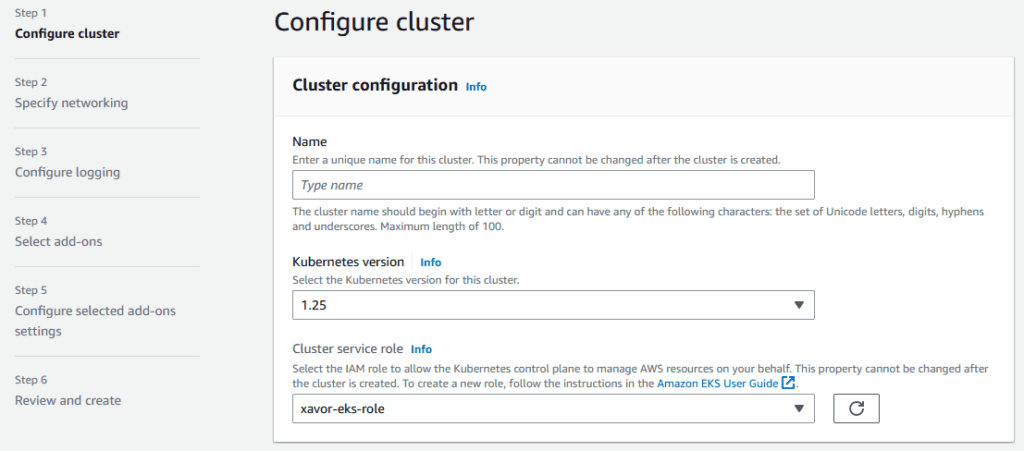
- Select a reputation on your cluster and choose the model and position you created earlier and click on Subsequent.
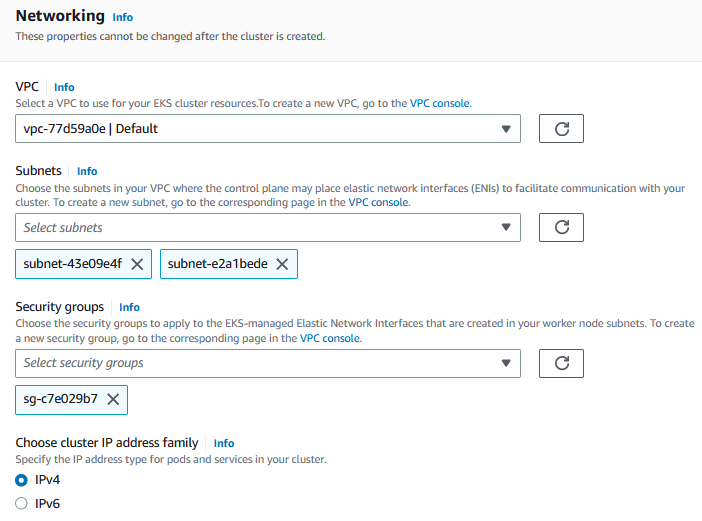
- Beneath “Networking,” select the VPC and subnets we created earlier. Select the safety group you wish to use along with your EKS Cluster.
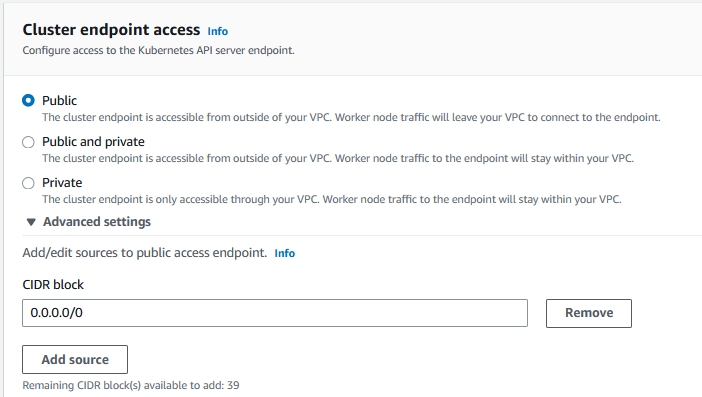
- Configure your cluster endpoints. For now, we are going to go along with public endpoints.
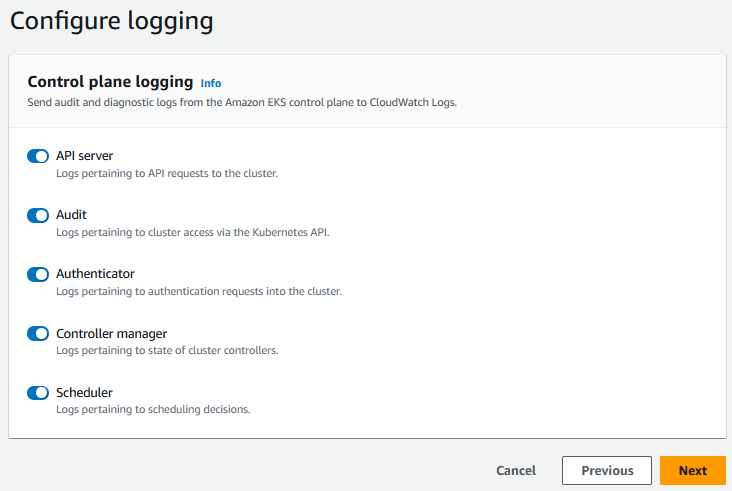
- Click on Subsequent to configure logging. You may choose the kind of logging you need.
- Click on Subsequent to configure add-ons. Often, these add-ons are put in by default.
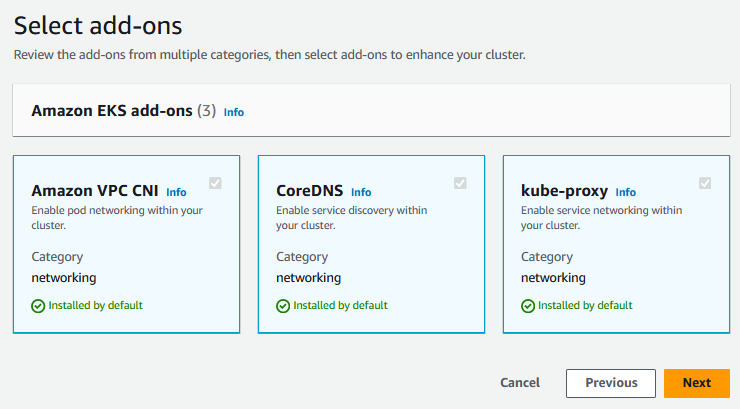
- Click on Subsequent to configure the chosen add-ons.
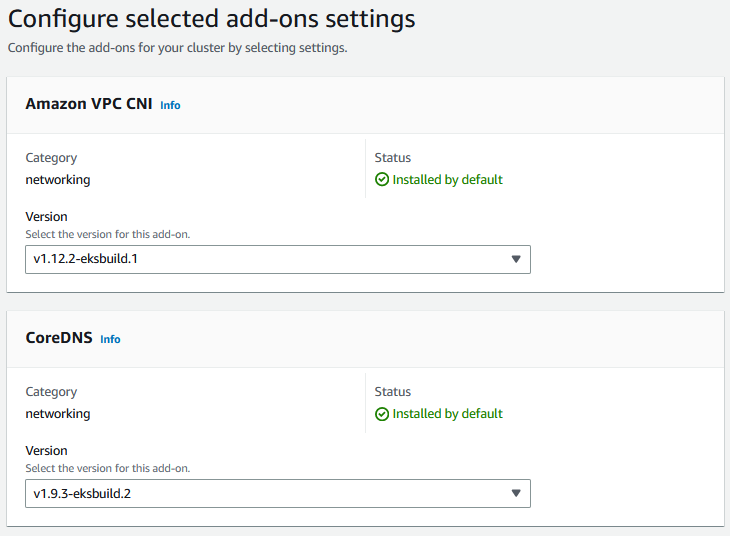
- Click on Subsequent to evaluate and create your cluster.
It could possibly take a while to create one thing. With the kubectl command-line instrument, you possibly can entry the cluster as soon as it has been shaped.
Step 4: Configure kubectl for EKS
Launch one EC2 machine, join it with putty, and set up kubectl, iam-authenticator, and AWS CLI on this machine.
Set up kubectl:
https://docs.aws.amazon.com/eks/latest/userguide/install-kubectl.html
Set up iam-authenticator: https://docs.aws.amazon.com/eks/latest/userguide/install-aws-iam-authenticator.html
Set up AWS CLI:
https://docs.aws.amazon.com/cli/latest/userguide/cli-chap-configure.html
Use the command under to configure kubectl for Amazon EKS after you have put in kubectl and the AWS-CLI in your machine.
aws eks –area <regionname> update-kubeconfig –identify <cluster-name>
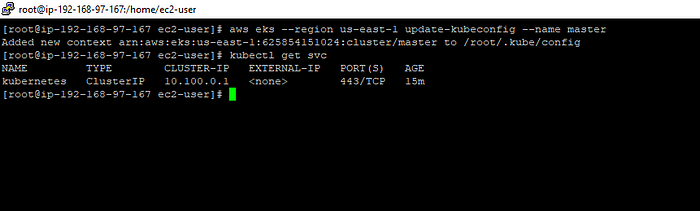
You may see that the EKS cluster is configured with kubectl.
We will now check our configurations utilizing the kubectl get svc command: kubectl get svc
Step 5: IAM Position for Employee Nodes
- Set up a job in IAM for employee nodes by following the directions listed under.
- We start by assigning the EKS employee nodes an IAM position.
- Entry the IAM Console and choose Roles.
- Select EC2 from the listing of Widespread use instances beneath Select a use case, then select Subsequent: Permissions.
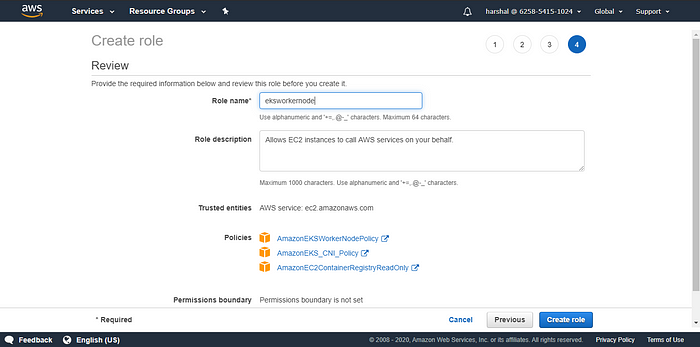
- Select the next 3 insurance policies from the Filter insurance policies field.
AmazonEKSWorkerNodePolicy
AmazonEKS_CNI_Policy
AmazonEC2ContainerRegistryReadOnly
6. Position identify, enter a reputation on your position, resembling RoleForWorkerNode, then select to Create a job.
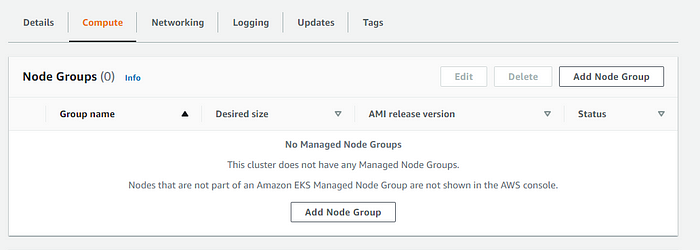
Step 6: Launch employee nodes
Go to EKS Console and click on on Compute. There you will note Add Node Group. Click on on Add Node Group.
Configure Node Group
Choose the IAM position which we created within the earlier step (RoleForWorkerNode).
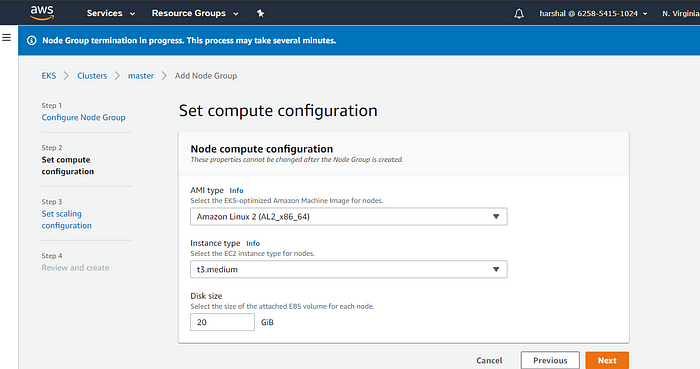
Set compute configuration
You’ll choose the Picture for Occasion (AMI), occasion dimension, and disk dimension on your employee nodes.
Set scaling configuration
You may choose the utmost and minimal variety of your nodes.
For instance: if you choose 2 as the utmost dimension, 2 employee nodes are created.

Assessment and Create
Assessment all of your configurations like cross-check occasion dimension, ami, node group dimension, and after reviewing all these particulars click on on Create.
Examine Standing
Use kubectl to test on the standing of your employee nodes: kubectl get node
Step 7: Deploy Purposes to Your Cluster
Now that you’ve got your cluster and employee node group arrange, you possibly can deploy your functions to your cluster. To do that, carry out the next steps:
- Create a Kubernetes deployment file on your software, specifying the container picture and different settings.
- Use the kubectl command-line instrument to use the deployment file to your cluster.
- Monitor the deployment standing utilizing kubectl instructions and the Amazon EKS console.
For instance, the next command deploys an NGINX container to your cluster:
$ kubectl create deployment nginx –picture=nginx
You may then monitor the deployment utilizing the next command:
$ kubectl get deployment nginx
Optionally available: Scale Your Purposes
One of many key advantages of utilizing Kubernetes is the flexibility to scale your functions up and down as wanted. To scale your functions, carry out the next steps:
- Replace the deployment file on your software to specify the specified variety of replicas.
- Use the kubectl command-line instrument to use the up to date deployment file to your cluster.
- Monitor the scaling standing utilizing kubectl instructions and the Amazon EKS console.
For instance, the next command scales the NGINX deployment to a few replicas:
$ kubectl scale deployment nginx –replicas=3
Conclusion
To sum up, Amazon EKS is a robust and absolutely managed Kubernetes service supplied by AWS that means that you can deploy and handle Kubernetes clusters on the AWS cloud. This text has supplied a step-by-step information on easy methods to create an Amazon EKS cluster, create a employee node group, and deploy Kubernetes functions to the cluster.
By utilizing Amazon EKS, you possibly can reap the benefits of the numerous advantages of Kubernetes clusters, together with container orchestration, scalability, and portability, whereas decreasing the operational burden of managing the underlying infrastructure. Moreover, AWS gives quite a lot of instruments and providers that may enable you to optimize the efficiency and value of your Kubernetes workloads, resembling AWS Auto Scaling and spot cases.
General, Amazon EKS is a superb possibility for organizations that wish to leverage the ability of Kubernetes within the cloud.
Xavor is an AWS companion. We provide a bunch AWS cloud providers to allow our purchasers to unlock their cloud potential. If you wish to up your cloud sport, drop us a line at [email protected]. Our DevOps & Cloud crew will get in contact with you to debate how Xavor may also help you obtain your targets.
[ad_2]
